
Notifications
Categories
Tags
Archives
Posted by Henry Philip
Filed in Arts & Culture 30 views
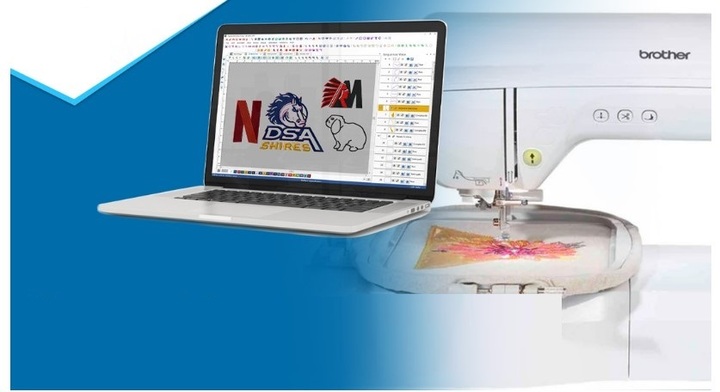
Turning a beautiful logo or artwork into an embroidery design is not as simple as saving a file with a new extension. Embroidery machines need special instructions that tell them where to stitch, what stitch type to use, and how to move from one area to another.
If you want to convert artwork into PES format, your design must first be converted into embroidery-ready stitch data. PES is a popular embroidery file format used by compatible embroidery machines, especially in home and small-business embroidery setups.
In this guide, you will learn what PES files are, how artwork is converted, which file types work best, and how to get better embroidery results.
PES is an embroidery file format that stores information needed by an embroidery machine to stitch a design. Unlike a regular image file, a PES file contains embroidery instructions rather than pixels.
A digital image may show a logo perfectly on your computer screen. However, an embroidery machine cannot simply read that image and stitch it automatically.
A properly prepared PES file can contain information such as:
This is why PES embroidery conversion requires more than simply changing JPG, PNG, or another file extension to .pes.
Artwork is commonly created for websites, signs, packaging, social media, or printing. Embroidery machines work differently.
When you convert artwork into PES format, the design is transformed into stitch-based information that an embroidery machine can understand.
This is useful for:
For example, imagine you have a PNG logo with three colors. The PNG contains pixels, but the embroidery machine needs to know how to recreate those three colors using thread.
The digitizing process creates that roadmap.
Many common artwork formats can be prepared for PES embroidery conversion.
JPG files are widely used but may contain compression and background details. A simple, high-resolution JPG is easier to work with than a blurry image.
PNG artwork is often useful when a logo has a transparent background. Clean edges can make the digitizing process easier.
Vector artwork is usually a strong starting point because shapes and outlines are clearly defined. Clean vector graphics can make it easier to create accurate embroidery objects.
PDF files may also contain useful artwork, but the quality and structure of the content should be checked before digitizing.
The important factor is not only the file extension. Artwork quality, detail, size, colors, and intended embroidery location all affect the final result.
The conversion process generally involves several important stages. Simply opening an image and exporting it as PES will not produce a professional embroidery design.
Start with the cleanest artwork available.
Remove unnecessary backgrounds, unwanted details, and objects that will not be embroidered. If the artwork contains text, make sure the letters are clear and readable.
Simple artwork is often easier to digitize than highly detailed artwork.
Before creating stitches, the artwork should be examined carefully.
A digitizer considers:
The same logo may need different digitizing settings when it will be embroidered on a cap instead of a flat cotton shirt.
The artwork is then divided into sections that can be represented using embroidery stitches.
For example, a logo might contain:
Each section needs appropriate settings to produce a clean result.
Stitch direction can have a major impact on the appearance of embroidery.
Changing stitch angles can create visual texture and help the design look more natural. Good stitch direction can also help control how fabric reacts to embroidery.
Underlay stitches provide a foundation beneath the visible stitches. They can help stabilize fabric and improve coverage.
Push and pull compensation is also important because fabric and thread can move during stitching.
Without proper compensation, some areas may look smaller, distorted, or uneven after embroidery.
The digitizer selects thread colors that closely match the original artwork.
Keep in mind that screen colors and thread colors are not identical. A color that looks perfect on a monitor may appear different when stitched.
Embroidery designs must be created for their intended application.
A design for a large jacket back can contain more detail than a small left-chest logo. Tiny lettering and narrow shapes may become difficult to stitch if the design is reduced too much.
Once the embroidery design has been digitized, checked, and optimized, it can be saved or exported in PES format when compatible with the intended machine.
At this stage, the file contains embroidery instructions rather than ordinary image information.
Technically, you may find software that appears to convert an image into an embroidery format automatically. However, this does not mean the resulting design will be ready for quality embroidery.
A JPG contains pixels. A PES file contains stitch instructions.
Therefore, a proper JPG to PES conversion usually requires embroidery digitizing.
Automatic conversion may work for very simple artwork, but detailed logos often require manual adjustments.
A good PES file should be created according to the design and fabric rather than using the same settings for every project.
Important factors include:
Too many stitches can make an area stiff and heavy. Too few stitches may result in poor coverage.
Different shapes require different stitch structures. Satin stitches, fill stitches, and running stitches each have specific uses.
A logical sequence can reduce unnecessary jumps, trims, and color changes.
Underlay should support the design without creating excessive bulk.
Proper compensation helps maintain the intended shape when the design is stitched.
Even when a design looks excellent on a computer, the stitched result may reveal problems.
Some common issues include:
These problems are often related to digitizing settings rather than the original artwork.
If you want professional-looking embroidery, consider these practical tips.
A clean logo gives the digitizer a better starting point. Whenever possible, provide the original vector artwork or the highest-resolution image available.
A design intended for a 3-inch chest logo should not be digitized exactly like a 10-inch jacket-back design.
Always provide the required embroidery dimensions.
Cotton, denim, fleece, caps, jackets, and performance fabrics can behave differently during stitching.
The digitizing approach should match the material.
Very tiny shapes may not translate well into thread. Some details need to be simplified before digitizing.
A sample stitch-out can reveal problems that are difficult to identify on a computer screen.
Testing is especially useful for important logos or production orders.
Professional digitizing can be a better option when the artwork is complex or the final embroidery needs to look polished.
Consider professional artwork to PES conversion when:
Digitizing Buddy can help prepare artwork for embroidery by focusing on stitch structure, fabric behavior, design size, and machine requirements.
It is important to understand the difference.
File conversion changes information from one digital format to another when the formats contain similar types of data.
Embroidery digitizing transforms visual artwork into stitch instructions.
For example:
PNG logo → embroidery digitizing → PES embroidery file
The middle step is what makes the design usable for embroidery.
Simply renaming logo.jpg to logo.pes does not create a valid embroidery design.
Most common artwork can be prepared for PES embroidery, but the quality of the final design depends on the artwork, detail level, size, fabric, and digitizing process.
A PNG image cannot normally become a useful embroidery design simply by changing its file extension. It needs to be converted into stitch data through embroidery digitizing.
No. JPG is an image format containing pixels, while PES is an embroidery format containing stitching information.
Start with clean artwork, provide the correct final dimensions and fabric information, use suitable stitch settings, and test the design before production.
Yes, but very small text can be difficult to embroider clearly. Letter size, font style, fabric, and stitch settings all affect readability.
Learning how to convert artwork into PES format starts with understanding that embroidery files are more than ordinary images. A successful conversion transforms artwork into carefully planned stitches that an embroidery machine can follow.
The best results come from clean artwork, suitable stitch types, correct density, proper underlay, accurate compensation, and appropriate design sizing.
Whether you are preparing a business logo, custom clothing design, cap artwork, or promotional embroidery, taking the time to create a properly digitized PES file can make a major difference in the final stitch-out.